TLDRJust generated my first G-code for a balance staff using Fusion 360, though I’m not sure it’ll work since the staff is incredibly tiny. Still, it's thrilling to be making progress in such a precise and patient craft. 🔍 Check out the journey with a video update on my blog!
Show moreShow less
Balance Staff G-Code: First Try!
Today I added the tool to the Fusion 360 library and generated my first G-code for the balance staff.
No idea if it’ll actually work — the staff is incredibly tiny — but still, it’s super exciting to be taking these steps forward!
Every day feels like a leap into precision and patience 🔍
TLDRJust built a gang-style tool holder for my lathe using a Jet-12 drill press, mixing manual drilling and CNC milling for precision. This setup is perfect for quick tool swaps, boosting efficiency in my watchmaking projects. If you're into DIY tooling or just love practical shop solutions, check out the full process in my YouTube video! 🎥
Show moreShow less
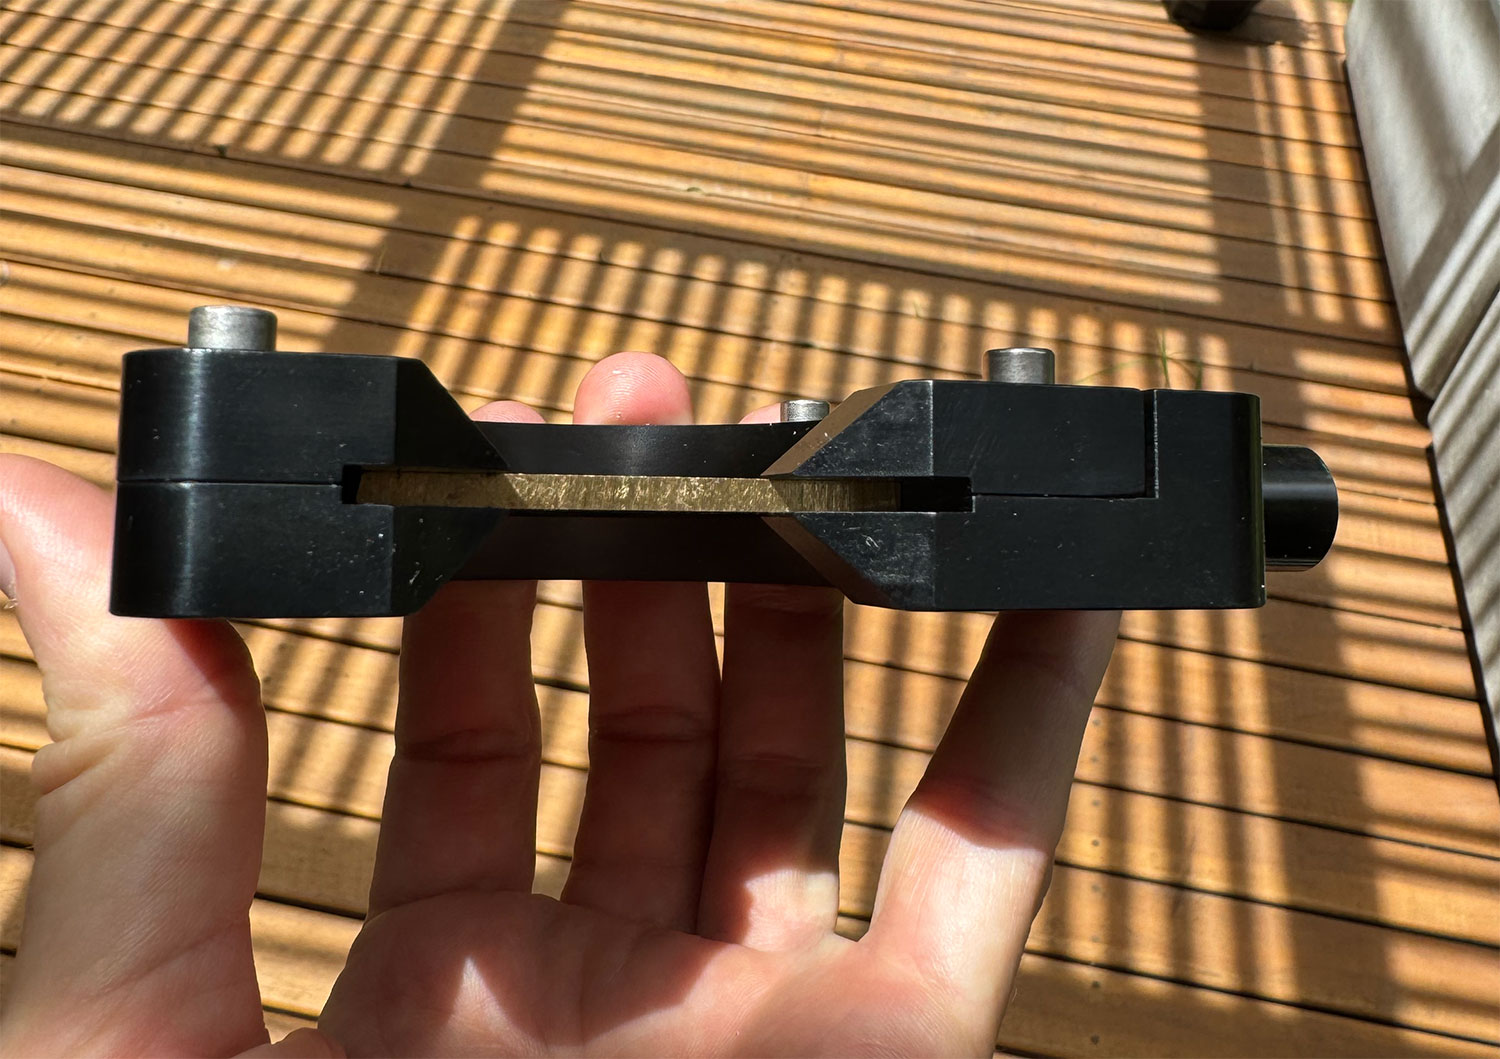
🔩 Building a Gang-Style Tool Holder with the Jet-12 Drill Press
Hey everyone! 👋 Just wrapped up a fun and super practical project: I made a custom gang-style tool holder for my lathe using the trusty Jet-12 drill press 🛠️.
And made a youtube video about it!
The idea was simple: take a solid aluminum base (of 6061) and add four holes — three threaded, one milled — to hold different lathe tools in place. Perfect for quick swaps and consistent positioning 💡.
Using the Jet-12, I drilled the holes manually 🌀 and then tapped three of them for screws 🔩. The fourth hole? I milled it with G-code on my CNC for precise dimensions. Mixing manual and CNC machining is always a fun combo — and it worked great! 😎
The result is a simple but super useful gang-style holder that boosts efficiency and repeatability, especially for small precision parts like the ones I make for my watchmaking projects ⌚️.
If you’re into lathes, tooling setups, or just like geeking out over shop-made solutions, I think you’ll enjoy the process. I’ve got a video showing everything — check it out! 🎥👇
TLDRDiving into toolmaking, I tried my hand at cutting and grinding HSS bars to make lathe tools, shaping them with a 45° angle. 🛠️ While there's still room for improvement, testing them on the lathe was super rewarding. It’s early days, but crafting my own tools is a fun and satisfying journey. 😊
Show moreShow less
First Steps in Toolmaking: Grinding HSS Bars ⚒️
Today I ventured into a new territory: sectioning and grinding HSS bars. I cut them to size and shaped them with a 45° angle—my first attempt at making lathe tools! 🛠️
After that, we ran some tests on the lathe to see how they performed. Still a lot to refine, but it’s incredibly satisfying to start using tools I shaped myself.
Onward to sharper edges and cleaner cuts! I'm still experimenting and not an expert — just learning and having fun 😊
TLDRJust started designing a Bitcoin watch complication that visually circles every 10 minutes, mirroring the average time to mine a new Bitcoin block. ⛏️ It's early days, but seeing it come together is exciting. Stay tuned for updates as this unique concept evolves!
Show moreShow less
Exploring the Bitcoin Complication 🪙🕰️
Today I started trying out an initial layout for the Bitcoin complication. The concept is simple but exciting: a visual element that circles every 10 minutes—in sync with the average time it takes to mine a new Bitcoin block. ⛏️
It’s still very early in the design phase, but seeing it take shape inside the movement layout is incredibly motivating. Can’t wait to share more as this idea evolves!
TLDRAfter a tough bout with the flu and some lung issues, I'm back and energized! 🎉 I've upgraded my Elara fixture to fit 3mm brass plates perfectly, solving previous precision problems. The big win? I finally got the crucial Incabloc springs, marking a major milestone—now just the hairspring to go! 🛠️
Show moreShow less
Back After a Rough Flu—And Big News! 💪✨
Wow—apologies for the delay in posting! I was knocked down by a nasty flu, and even ended up with a bilateral pleural effusion (fluid around both lungs 😷). It took a bit to recover, but I’m finally feeling good again and super motivated to get back to the bench!
During this downtime, I also received a new fixture for the Elara that properly holds 3mm brass plates. My previous one was for 1/8" (3.175mm), so I had to use Loctite to fix the stock—definitely not ideal, and it was causing precision issues. Now everything fits snugly and cleanly. Much better! 🎯
And… wow, BIG NEWS: I finally got the Incabloc springs!!! 🥳 This is UBER exciting—these are one of the few critical components I simply can’t make myself, so having them in hand is a huge milestone. Now the only part left to source is the hairspring... and that’s a whole journey in itself. 😉
Back on track and more inspired than ever. Let’s go! 🛠️
TLDRThe Incabloc team helped refine my balance staff design with some simulation-based tweaks, making it a bit smaller but still solid during assembly. I'm still figuring out the right jewels for this tiny staff, but it's exciting to see the progress with each iteration. Big shoutout to Incabloc for their invaluable support! 🛠️❤️
Show moreShow less
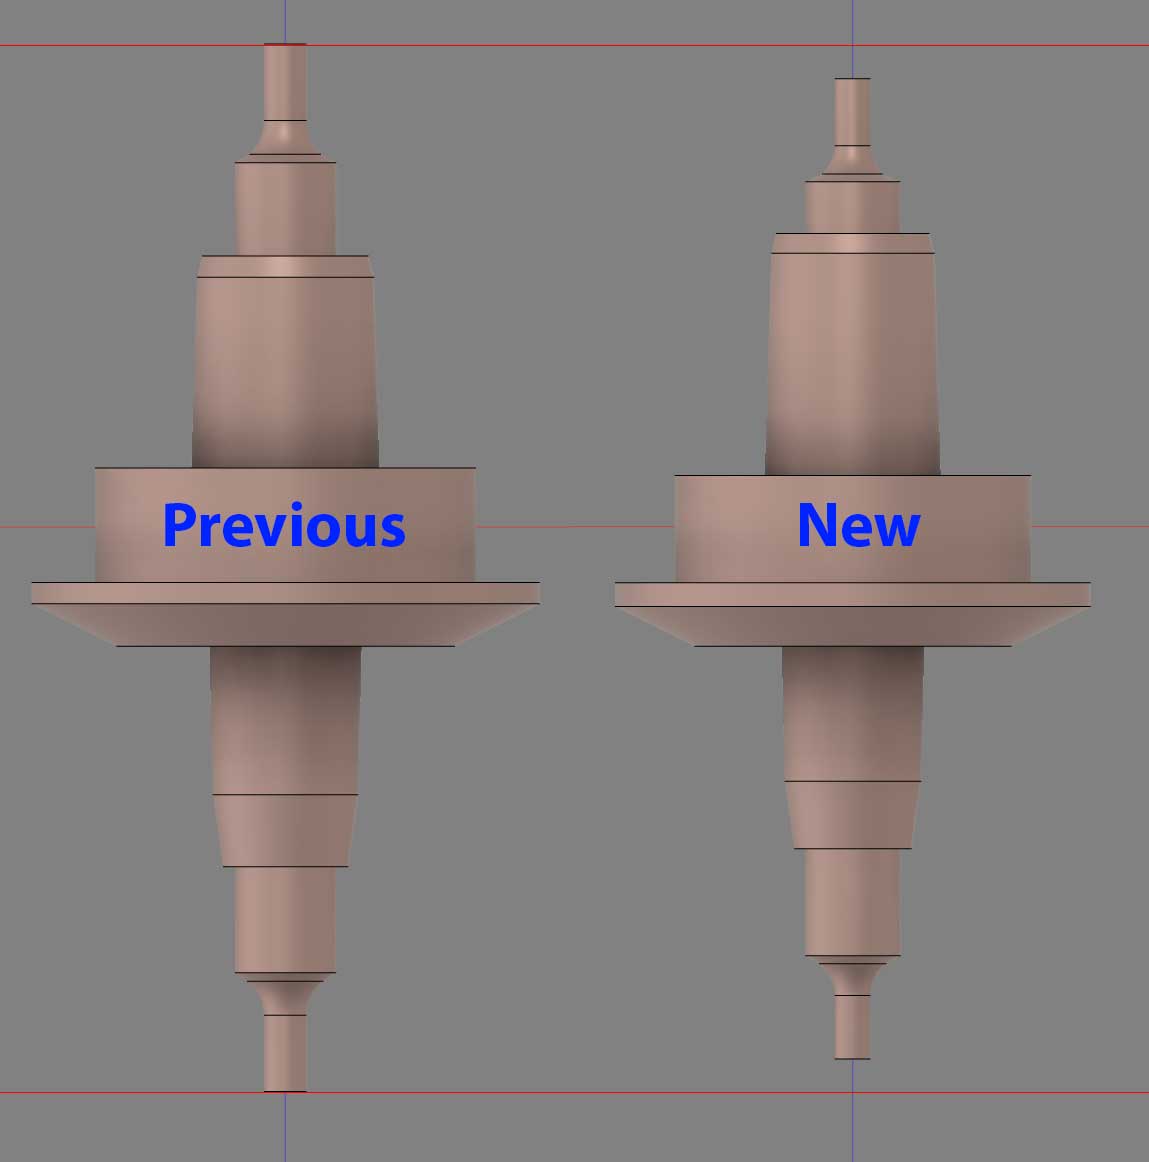
Balance Staff Update with Help from Incabloc 🔬✨
The fabulous team at Incabloc ran some simulations based on my setup and came back with a few recommended changes for the balance staff. Super grateful for their input!
I worked on those adjustments today. The new design makes the balance a little smaller, but during assembly, everything looks and feels good so far. 🎯
That said, I also realized I haven’t quite finished work on this guy yet—it’s a very small staff, and I’ll need to figure out which jewels to use and adapt the design accordingly. Another puzzle to solve. 🔍
Exciting to see things becoming more refined with every iteration. Big thanks again to Incabloc for their support! 🛠️❤️
TLDRFinally getting my watchmaking setup dialed in! 🛠️ The new lathe is a game-changer—solid, simple, and way more reliable than my last pricey mistake. With an upgraded microscope and dual screens, my space is now a hub for precision. Excited to keep pushing forward! 😎
Show moreShow less
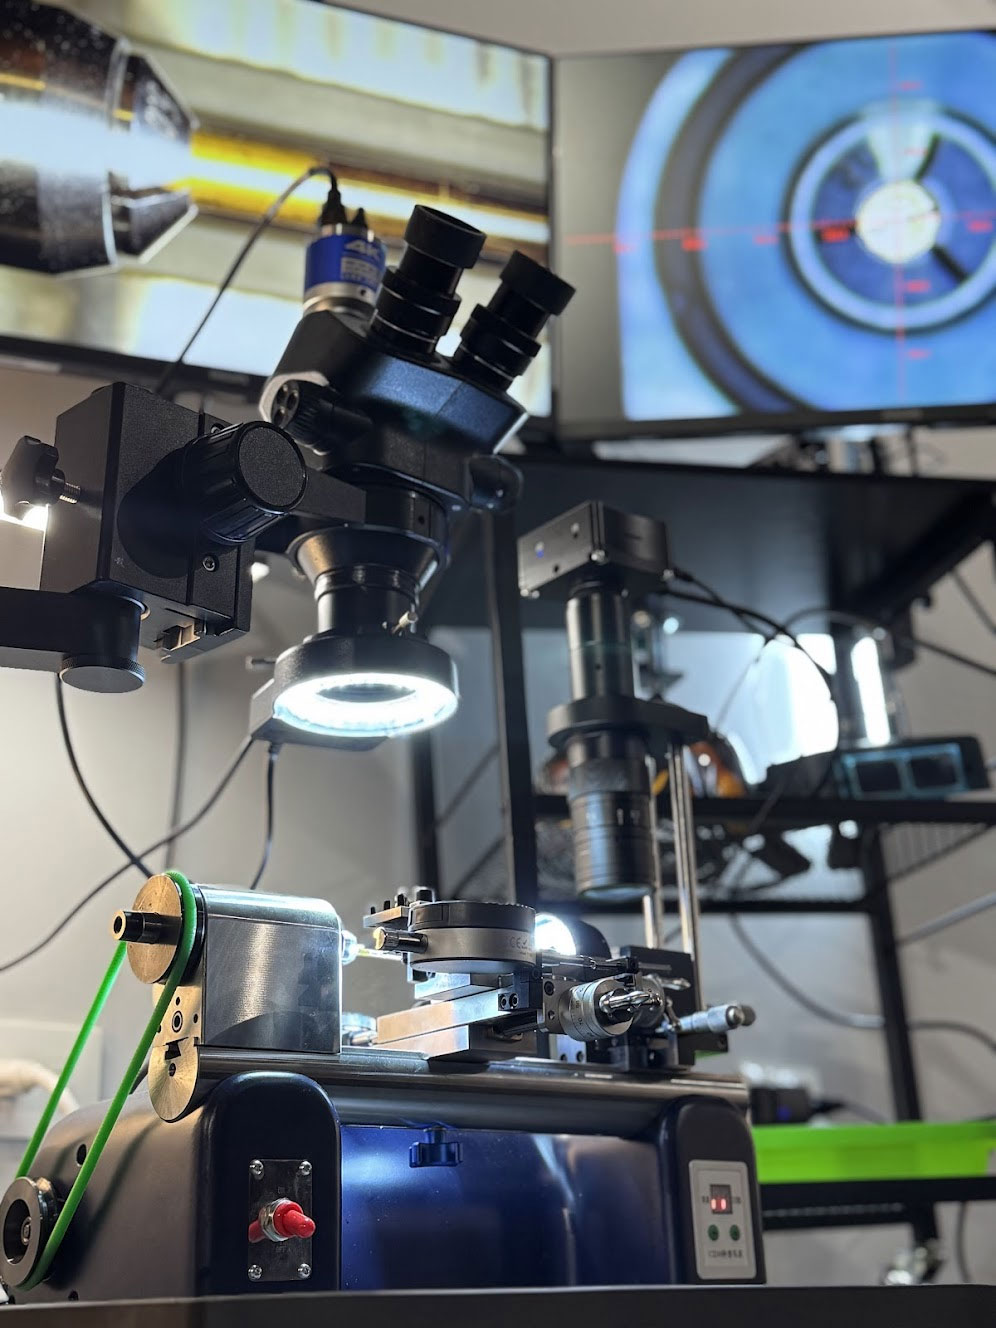
Watchmaker’s Corner Coming Together 🛠️
Today I spent some time giving love to the watchmaker’s lathe—a beautifully made machine by @watchmakerlathe. It’s seriously well-built and feels like it’s going to be the heart of the fine finishing process. ❤️
So far, this lathe—at a fifth of the price—has proven to be much better than the NSCNC lathe I unfortunately purchased. That one ended up feeling like a useless scam, unfortunately. This new setup? Solid, simple, and precise.
I also set up the microscope—yes, it’s a Chinese body, but I upgraded it with AmScope lenses, and paired it with two 24" screens. The result is a seriously comfy and capable workspace. 🔬💻
Bit by bit, the workstation is becoming a proper watchmaking lab. Super excited to keep refining and moving forward. 😎
TLDRToday’s project involved making four M4 clearance holes for an engine-supporting plate using Fusion 360 and ChatGPT for tool setup and speed adjustments. Even though the tool was a bit large for the Elara machine, some creative tweaks made it work smoothly, turning a simple task into a satisfying accomplishment. Small steps can lead to tangible real-world results, showing how technology and creativity can work hand in hand. 🔩
Show moreShow less
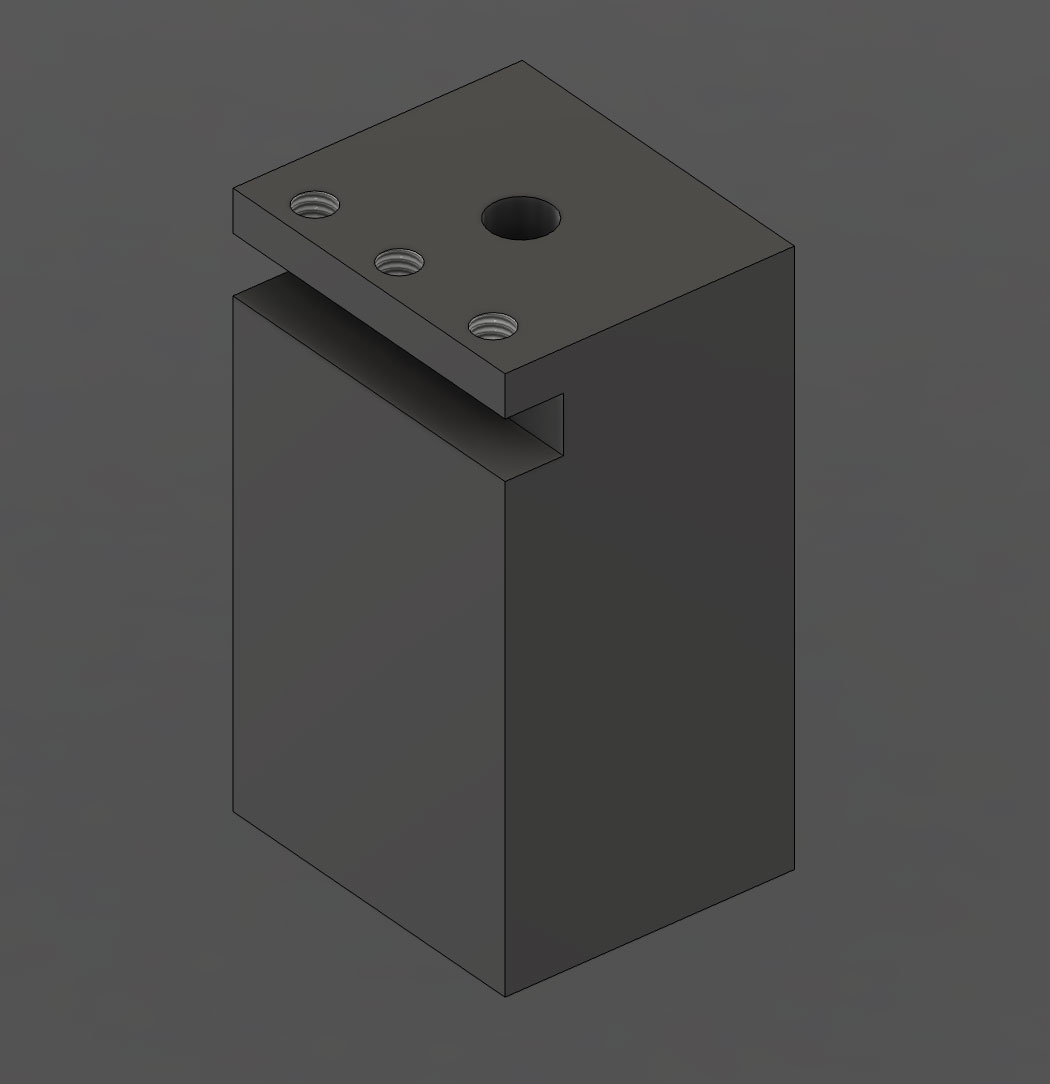
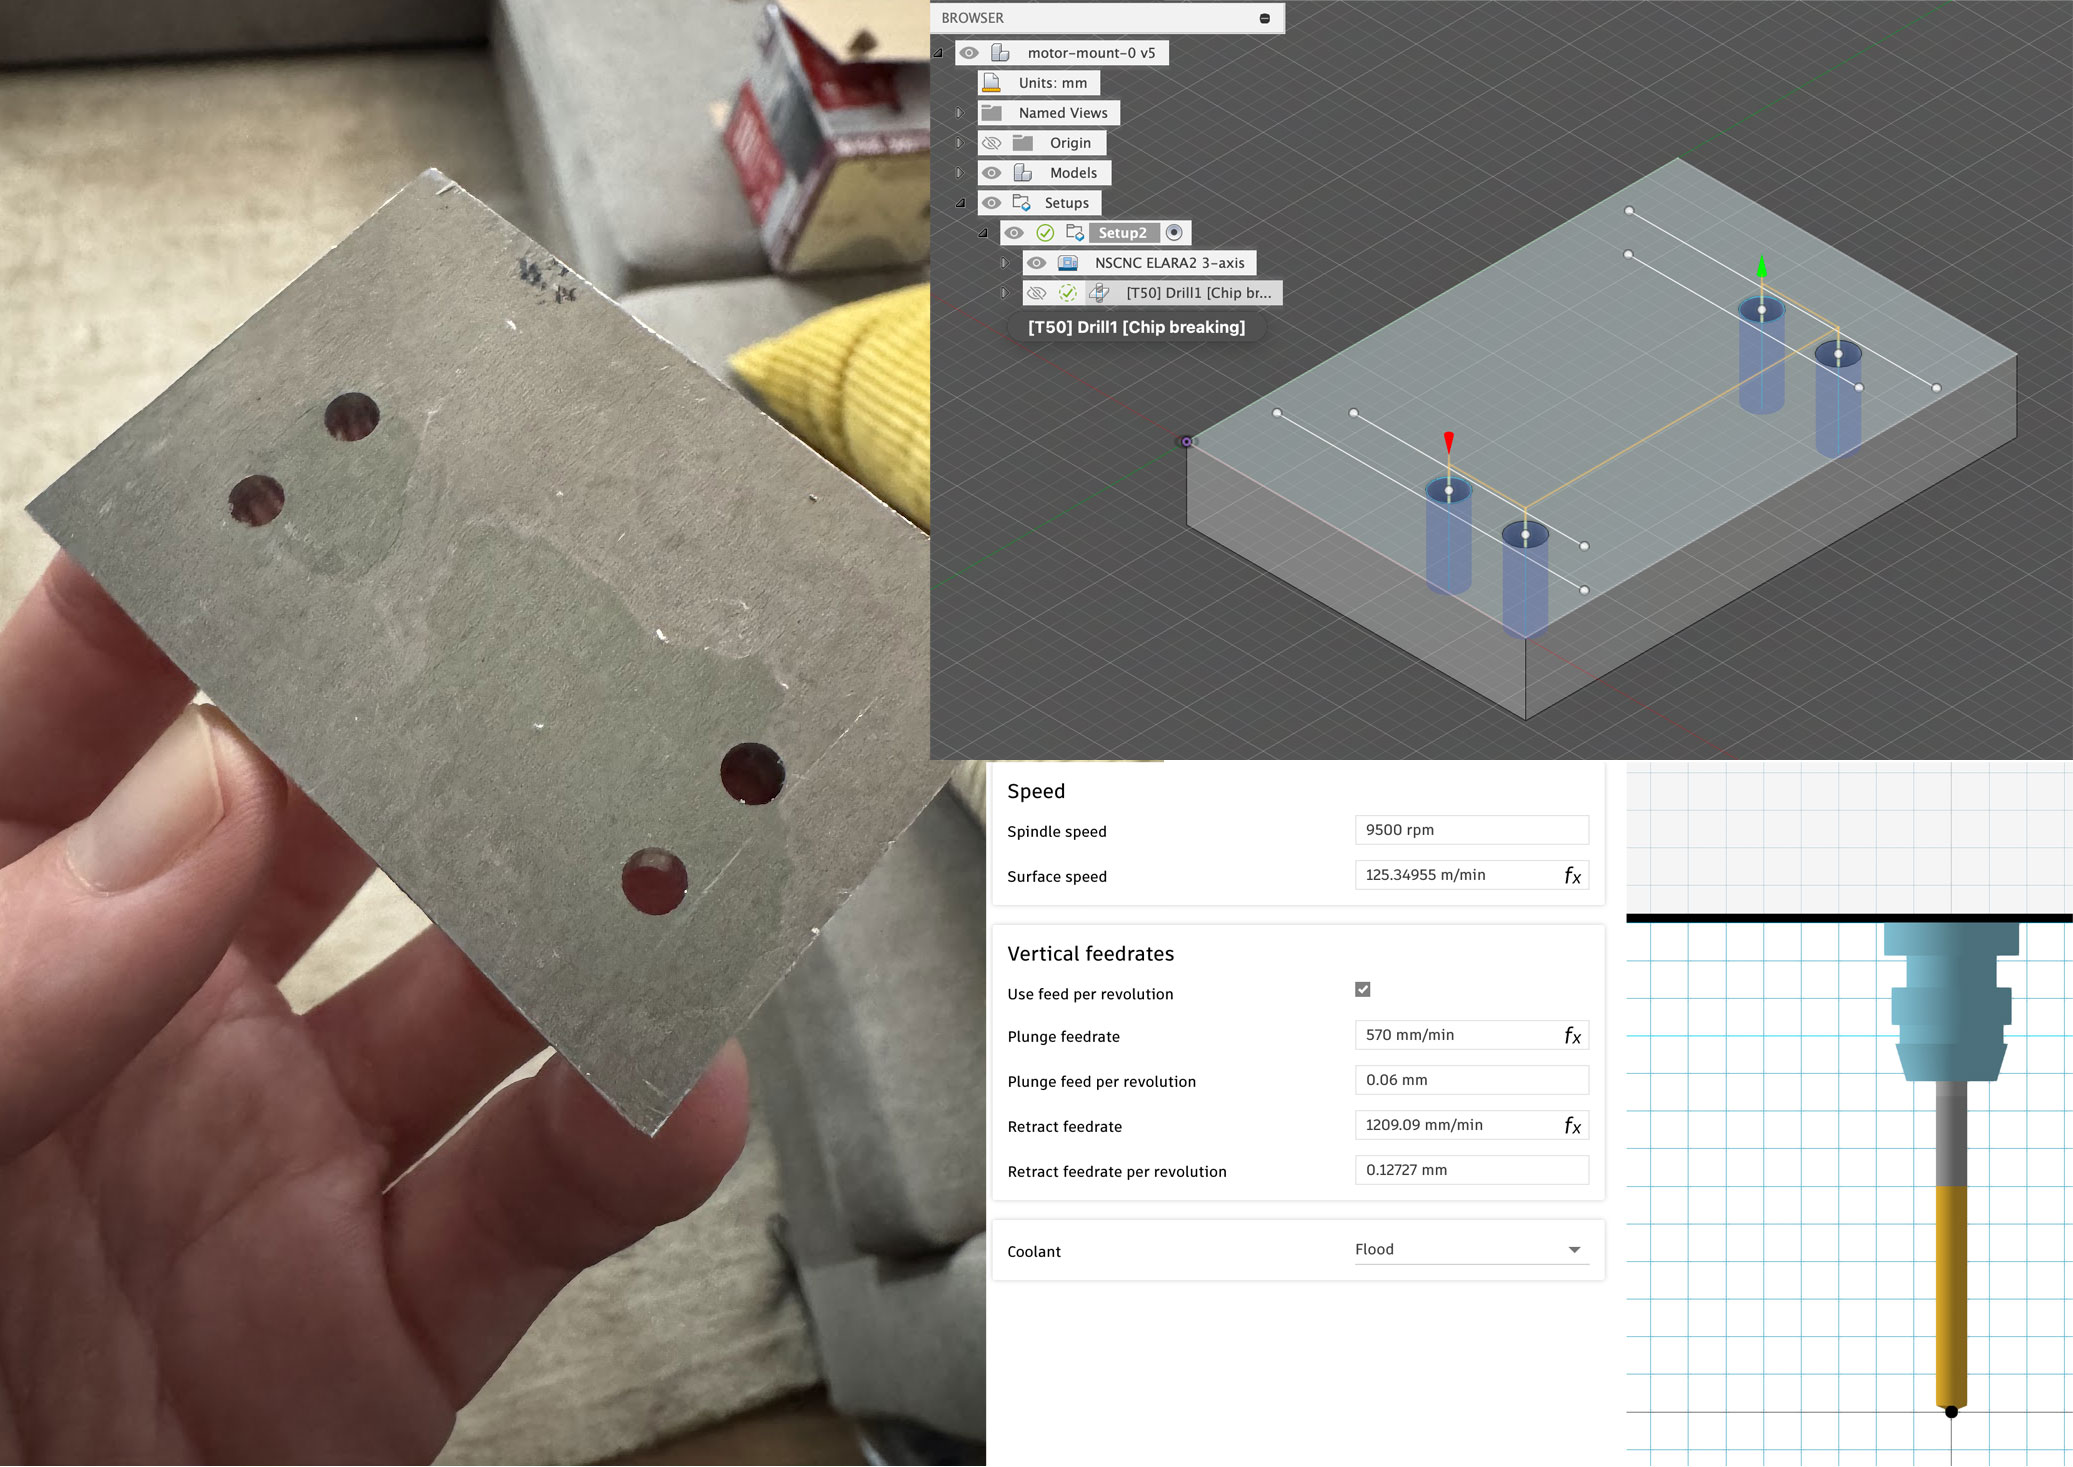
Simple but Satisfying: M4 Clearance Holes 💡
Today I did a small but meaningful exercise—making 4 clearance holes for M4 screws on a plate that will eventually support an engine. 🔩
I modeled the part in Fusion 360, created the tool setup using the tool’s actual specs, and got help from ChatGPT to figure out the right feeds and speeds. It worked surprisingly well!
The tool I used was a bit big for the Elara, so I had to do some creative adjustments to make everything fit and run smoothly—but it held up, and honestly, I think it did a great job. 😊
Always fun to turn small steps into real-world parts!
TLDRHey, guess what? Incabloc got back to me and even suggested cool tweaks to my balance staff design, which is a huge win! 🎉 This means I'm finally on the way to creating a proper spring-shock system—super pumped for this milestone! 🚀
Show moreShow less
Exciting News: Incabloc Replied! 🎉
I’m very pleasantly surprised—Incabloc finally replied to my inquiry! 😍 Not only did they answer, but they also suggested some awesome changes to the balance staff design, which I’m more than happy to implement.
It feels incredible to finally be on the path to having a proper spring-shock system for my balance. This is a major milestone, and I couldn't be more excited! 😄
Big step forward—woho! Onward to updating the design and bringing this movement closer to life! 🚀
TLDRRefactoring the Elara's codebase turned a few small tweaks into a major overhaul, leading to a cleaner, more efficient system that's easier to maintain. Key improvements include reducing UI clutter, correcting tool placement issues, and organizing code into a self-contained class with better version control. 🎨 The result? A more stable and organized experience that runs smoother and is easier on the eyes, thanks to some UI help from ChatGPT. 🚀
Show moreShow less
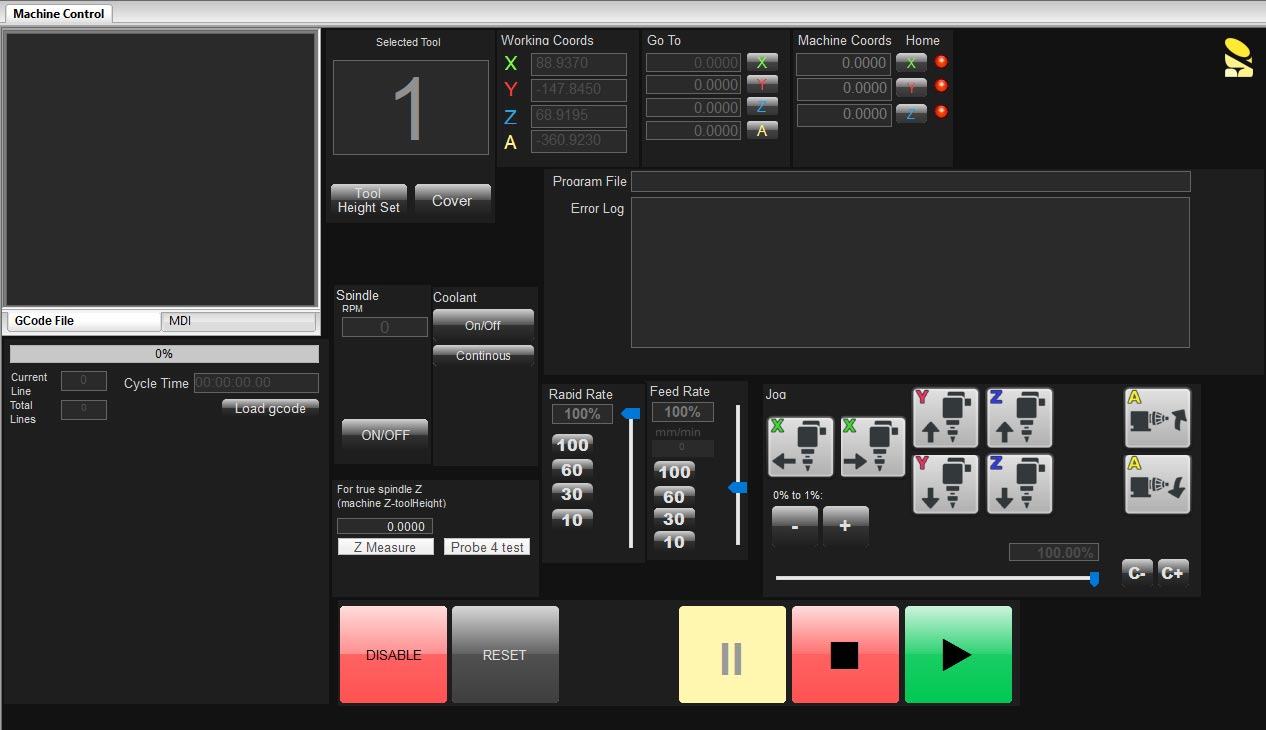
Deep Dive: Refactoring the Elara’s Codebase 🚀
I started noticing some quirks on the Elara that I wasn’t very happy with, and what began as simple tweaks turned into a deep rabbit hole that lasted a few weeks. 🕳️😅
In the end, I ended up refactoring the entire codebase for the mill system. It was a huge learning experience—and now, I truly understand the ins and outs of the Elara.
Main Things I Didn’t Like:
Cluttered UI with lots of elements I didn’t use at all
The spindle Z-point without a tool was incorrectly placed in the air, causing negative dimensions on shorter tools
Hardcoded access to machine variables (e.g., #1229) instead of using mc constants—making Mach4 upgrades risky
Inconsistent ways of storing data (profileWrite vs RegWrite)—making it hard to know the source of truth; I simplified it
A bunch of unused macros
Lots of global variables and dead code cluttering things up
No Ui blocking functions
The module is now a self-contained class that is instantiated properly on the respective threads (UI and macro)—making everything more stable and organized
Implemented a friendly VSCode project with a proper building mechanism and version control for better maintainability and upgrades
ChatGPT even helped me reach a nice balance on UI colors, though unfortunately the Mach4 UI editor is pretty limited. 🎨
For now, it looks like this—and I’m much happier with how everything runs and feels. Clean, simplified, and way easier to maintain. Onward! 🚀